.jpg)
5 Listing Photo Mistakes That Kill Home Sales


You only get one chance to make a first impression — and in real estate, that first impression happens on a 5-inch phone screen before a buyer ever steps foot inside your home.
According to the National Association of Realtors, 97% of homebuyers use the internet in their home search. Most spend an average of just 20 seconds deciding whether to click through to a listing — or scroll past it. Your photos are not just marketing material. They are the showing.
The problem? Most sellers — and unfortunately, some agents — don't treat them that way. Bad lighting, cluttered rooms, wrong angles, and too few photos are costing sellers thousands of dollars in lost traffic, reduced offer value, and extended days on market.
Here are the five listing photo mistakes we see most often — what they look like, why they're so damaging, and exactly how to fix every one of them before your home hits the market.
MISTAKE #1 📱 Shooting With a Phone Camera
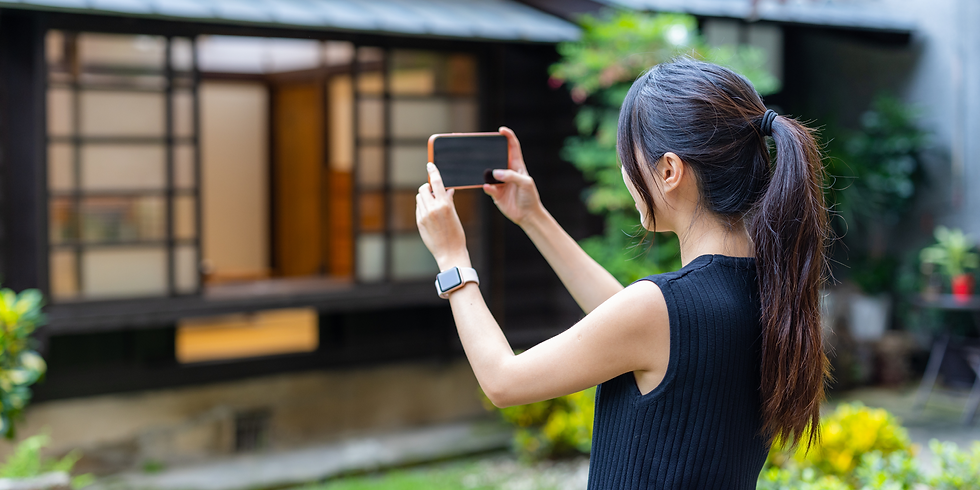
The #1 quality killer — and it shows immediately
📷 What it looks like in practice:
The photos look technically 'fine' — they're in focus and properly framed — but something is just off. The rooms look flat. The colors are slightly off. The wide angle isn't wide enough. The lighting is inconsistent. Buyers can't put their finger on it, but phone photos signal 'amateur' before a single room has been judged on its own merits.
💸 Why it kills your sale:
A 2021 study found that listings with professional photography sold 32% faster and for $3,000–$11,000 more than listings with amateur photos. Buyers perceive professional photography as a proxy for how well the seller (and their agent) are managing the entire transaction. A phone photo signals: this home isn't being marketed seriously. If they're cutting corners here, what else isn't being done right?
🧠 What the buyer thinks when they see this:
"These photos look like my neighbor took them. I'll keep scrolling."
✅ The Fix:
Hire a licensed real estate photographer — every time, without exception. A professional shoot for a standard home costs $150–$400 and should include HDR (High Dynamic Range) processing, wide-angle lenses calibrated specifically for interior photography, and proper color correction. For homes over $500,000, also consider video walkthrough, aerial drone footage (where permitted), and Matterport 3D virtual tours. The return on a professional photo investment is among the highest in all of pre-listing preparation.
💡 Pro Tip: Ask to see your photographer's real estate portfolio specifically — not just their general photography work. Real estate interior photography is a specialized skill involving lens selection, flash bouncing, and bracket exposure techniques that most general photographers haven't mastered.
MISTAKE #2 🌑 Dark, Dim, or Mixed-Light Photos
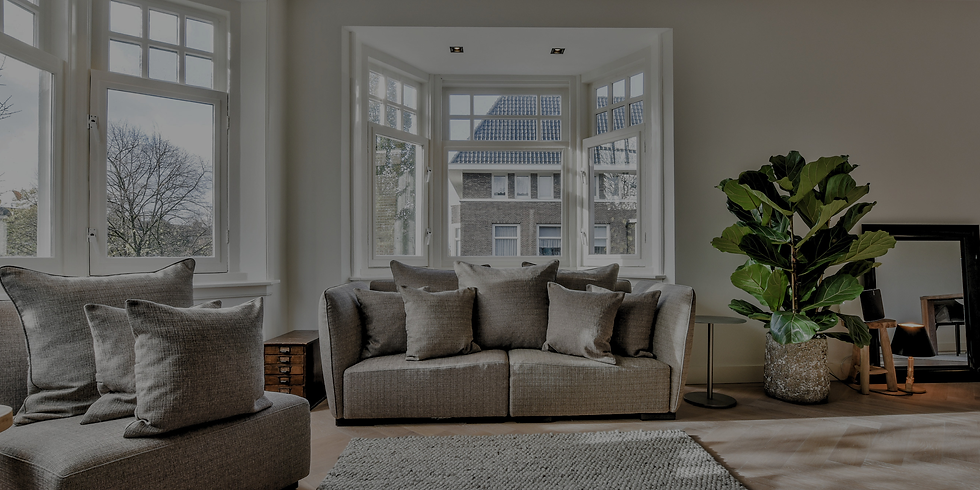
Light sells homes. The absence of it kills them.
📷 What it looks like in practice:
The living room photo shows a warm but dim space. The bedroom looks almost gray. The kitchen countertops are glowing from overhead lights while the window behind them blows out to white. Half the bathroom is in shadow. Individually, each room might look acceptable — together, the listing reads as dark, tired, and uninviting.
💸 Why it kills your sale:
Buyers associate darkness with age, neglect, and hidden problems. It is one of the most powerful negative signals a listing can send — particularly in photos, where the brain processes contrast, color temperature, and brightness almost instantly before any rational evaluation begins. A bright room feels newer, cleaner, and larger. A dark room triggers doubt. In a digital scroll environment where buyers make decisions in seconds, doubt means skip.
🧠 What the buyer thinks when they see this:
"This place looks so dark. Is it always like this? There must be something wrong with the windows. Or the layout. Or something."
✅ The Fix:
Maximize light at every level before the photographer arrives. Replace every bulb with warm white (2700K–3000K) LEDs at the same color temperature — mismatched bulbs create color casts that even editing can't fully correct. Remove heavy window treatments or swap them for light-filtering sheers the day before the shoot. Clean every window inside and out — dirty glass dramatically reduces how much natural light enters and photographs. Turn on every single light source in the home for photos, including closet lights. Open all interior doors. If the home still has dark areas, discuss supplemental lighting with your photographer — professionals carry flash units that can fill shadows without creating the flat, washed-out look of an on-camera flash.
💡 Pro Tip: Request HDR photography specifically. HDR (High Dynamic Range) photography involves shooting each frame at multiple exposure levels and blending them in post-processing — correctly exposing both bright windows and darker interior spaces simultaneously. Without HDR, photographers are forced to choose between properly exposed interiors with blown-out windows, or properly exposed windows with dark rooms. With HDR, you get both.
MISTAKE #3 🗑️ Clutter, Personal Items, and Distractions Left in Frame
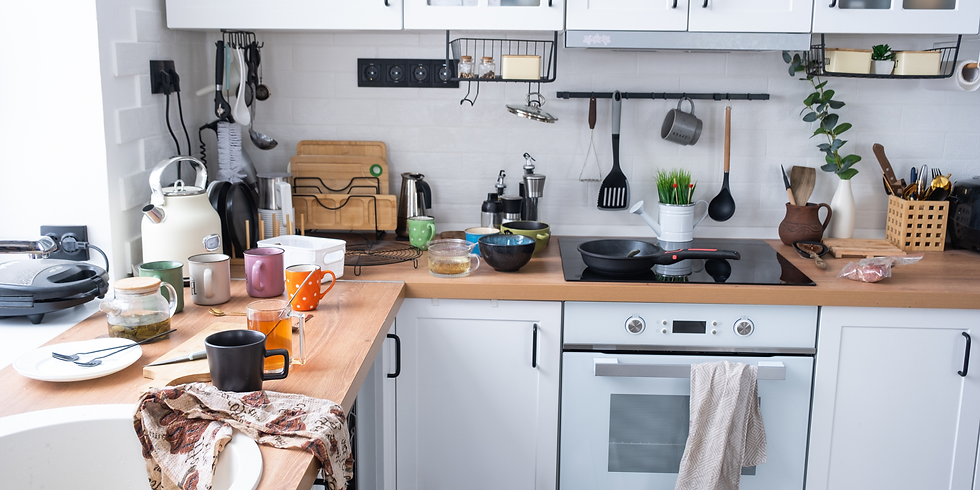
Buyers can't picture themselves in someone else's home
📷 What it looks like in practice:
The kitchen counter has an appliance, a knife block, a drying rack, some mail, a child's drawing attached to the refrigerator, and three decorative roosters. The living room bookshelf is completely full. The master bedroom has family photos on every surface, a pile of laundry visible on the closet floor, and a dog bed in the corner. The bathroom vanity has a toothbrush holder, two prescription bottles, a hair dryer, and assorted personal products.
💸 Why it kills your sale:
Clutter is the enemy of aspiration. Buyers don't buy rooms — they buy the fantasy of how they'll live in those rooms. Personal items, collections, family photos, and everyday clutter interrupt that fantasy and replace it with someone else's reality. The brain immediately shifts from 'this could be my home' to 'this is their home.' That psychological break is extremely difficult to recover from. Additionally, clutter makes every room photograph smaller — which directly affects how buyers perceive value relative to price.
🧠 What the buyer thinks when they see this:
"It feels so crowded. And personal. I can't really picture myself living here. It just feels like their house, not a house I could buy."
✅ The Fix:
Declutter before the photographer arrives — not after. For photos specifically, every room should be at 40–50% of its current contents. Kitchen: every item off every counter, including small appliances. Refrigerator: every magnet, photo, and note removed. Bathroom vanity: completely clear — soap dispenser and one small plant only. Bedrooms: nightstands cleared to one item per side maximum. Living areas: personal photos, collections, and extra decorative items removed and stored. Then, add back three to five intentional, neutral, photogenic items: a bowl of fresh lemons, white flowers, a simple plant, a clean cookbook open to an appealing page, folded throw on the sofa arm.
💡 Pro Tip: Create a 'photo staging' mode versus 'living mode' for the period between photos and listing. Photos are taken once — make them perfect. Then live normally in the home during the listing period. But every item you prepare for photos should be restorable in 30 minutes for showing prep.
MISTAKE #4 📐 Wrong Angles, Wrong Sequence, Wrong Coverage

How photos are composed and ordered matters as much as quality
📷 What it looks like in practice:
The living room is photographed from a corner, making it look triangular and awkward. The kitchen is shot straight on toward a wall of cabinets, hiding the counter space. The dining room photo is from a sitting position, making the ceiling look low. Photos of the backyard are taken in the harsh afternoon shade. The listing shows 8 photos total — living room, one bedroom, one bathroom, front exterior, backyard, and three closeups of cabinet hardware. There are no photos of the primary bedroom, the garage, or the second bathroom.
💸 Why it kills your sale:
Angle determines whether a room looks spacious or cramped — the same room, photographed from different positions, can appear either welcoming or claustrophobic. Wrong angles communicate the opposite of what you intend. Incomplete coverage sends an even more dangerous signal: buyers assume missing rooms have problems. If you don't show the primary bathroom, the buyer imagines the worst version of a bathroom — not the average version. Listing photo sequence matters too: the cover photo (the first image) is what determines the click-through rate on every platform.
🧠 What the buyer thinks when they see this:
"Why are there only 8 photos? They're not showing the master bedroom or the other bathroom. Something must be wrong with them. I'm not going to waste time touring this one."
✅ The Fix:
Every room must be photographed — no exceptions, no omissions. A complete listing should include: exterior front (hero shot), exterior back and yard, every bedroom, every full bathroom, living/family room, kitchen (multiple angles), dining area, garage interior, laundry area, and any bonus spaces (office, bonus room, basement). For a standard 3-bedroom home, plan for 25–40 photos minimum. Angles should always be shot from corners or doorways at standing height to maximize perceived space. The cover photo should be the most compelling exterior or living room shot — whichever makes the strongest first impression in a thumbnail. Confirm with your photographer that they are shooting every room before they leave.
💡 Pro Tip: Ask your agent to review the photo sequence before the listing goes live — not after. The order matters almost as much as the shots themselves. Lead with the most impressive exterior, then flow through the home in the same sequence a buyer would walk it. End with the backyard or a strong lifestyle shot. This sequencing creates a mental walkthrough that increases emotional engagement.
MISTAKE #5 ☀️ Shooting at the Wrong Time of Day
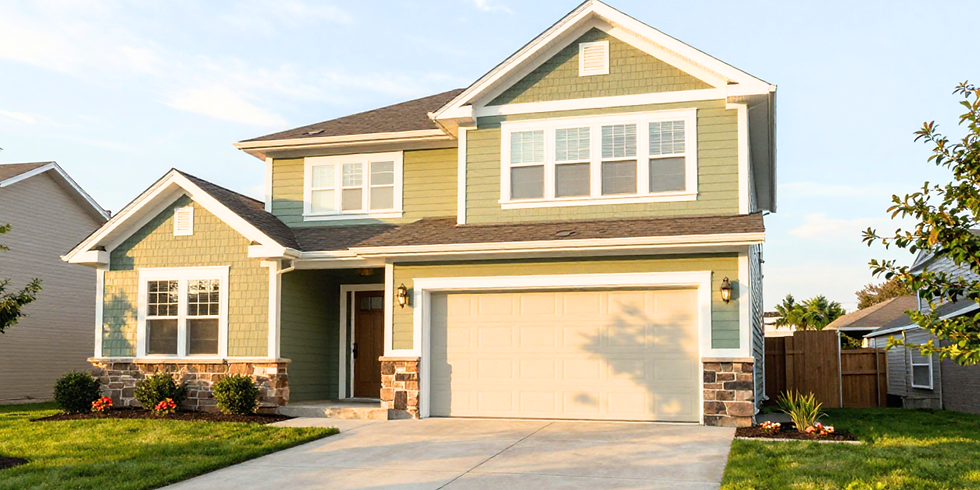
Golden hour makes the difference between beautiful and forgettable
📷 What it looks like in practice:
The front exterior photo was taken at 2pm on a Thursday. The sun is hitting the front of the house at a harsh, flat angle that washes out all the architectural detail. The shadow from the garage door creates an unflattering diagonal across the driveway. The sky is a stark, overexposed white. A neighbor's car is parked in front. The house looks institutional rather than inviting.
💸 Why it kills your sale:
Exterior photos taken in harsh midday sun flatten shadows, blow out highlights, and eliminate the warmth and depth that make a home look beautiful and welcoming. The same house photographed 45 minutes before sunset — during what photographers call 'golden hour' — looks like a completely different property. The warm directional light creates depth, highlights architectural features, and casts the home in the amber glow that triggers the emotional response sellers are trying to create. Interior photos similarly benefit from shooting in the morning when natural light is soft and diffuse rather than harsh and contrasty.
🧠 What the buyer thinks when they see this:
"The outside looks so... flat. And that harsh shadow makes it look smaller than it probably is. Meh. Let me look at the next one."
✅ The Fix:
Schedule exterior photography for the hour before sunset (evening golden hour) or the hour after sunrise (morning golden hour). For most homes, evening golden hour produces the most dramatic results — the sun hits the facade at a low, warm angle that creates depth and warmth simultaneously. Confirm the sun direction for your home's orientation with your photographer in advance — east-facing homes photograph best in the morning, west-facing homes in the evening. For interior photography, morning shoots with soft natural light typically produce more consistent results than afternoon shoots with harsh directional sun. On overcast days, interior photos often look better than on sunny days — the diffuse cloudy-sky light eliminates harsh shadows and creates even, flattering illumination throughout the room.
💡 Pro Tip: Twilight photography — shooting the exterior in the 15–20 minute window just after sunset when the sky turns deep blue and interior lights glow warmly through windows — is one of the most effective techniques for creating an emotional, aspirational first impression. It costs slightly more than standard photography but generates dramatically higher click-through rates on listing platforms. For mid-to-upper price range homes, twilight photography is consistently among the highest-return photo investments available.
5 Bonus Mistakes Worth Mentioning
These don't make the top 5 — but they're common enough to call out specifically:
🚗 Bonus Mistake: Cars in the Driveway or on the Street
Cars in listing photos are an immediate distraction that makes exteriors look cramped and less premium. Move every car off the property and request that your photographer choose a shooting angle that avoids street-parked vehicles. This is easy to fix and 100% within your control.
🚽 Bonus Mistake: Toilet Seat Left Up in Bathroom Photos
This sounds minor but registers immediately with buyers — and not in a positive way. Close every toilet lid, lower every shower curtain (to create a clean, enclosed visual), and remove all personal items from the vanity before the photographer arrives. It takes 30 seconds and makes a real difference.
🪞 Bonus Mistake: Photographer or Equipment Visible in Mirror Reflections
It happens more often than you'd think — a reflection in a bathroom mirror or bedroom dresser reveals the photographer, the camera, a tripod, or even a previous photo setup. Review every photo before approving the set. Most professional photographers catch this in post-processing, but a second set of eyes never hurts.
🌿 Bonus Mistake: Dead or Dying Plants Visible in Photos
A wilted plant in a kitchen window or a brown pot on a porch is a small thing that registers subconsciously as neglect. It undercuts the perception of care that good photography is trying to create. Remove all dead or struggling plants before photos. Spend $20 on fresh greenery if needed.
📏 Bonus Mistake: Too Few Photos (Fewer Than 20)
Listing platforms reward comprehensive coverage — Zillow's algorithm favors listings with more photos in search results. Buyers reward it too: listings with 20+ photos receive more views, more saves, and more showings than listings with fewer photos. A professional photographer should deliver 30–50 edited images for a standard single-family home. If you're getting fewer than 20, you need a conversation with your agent or photographer.
What the Research Says About Listing Photos
The data on real estate photography is consistent and compelling:
Listings with professional photography sell 32% faster than those with amateur or phone photos (IMOTO Photography / real estate industry research)
Homes with professional photos command $3,000–$11,000 more at sale compared to comparable homes with lower-quality photos
97% of homebuyers use the internet to search for homes (National Association of Realtors, 2023)
Listings with more than 20 photos receive more views, more saves, and more showing requests than listings with fewer photos on Zillow and Realtor.com
The primary listing photo determines click-through rate — buyers decide whether to open your listing in under 2 seconds based on the cover photo alone
Homes with drone aerial photography sell 68% faster than those without, according to MLS data studies
In Sacramento's current market — where 46% of homes sell above asking price — a home that stands out in photos goes into multiple offers. One that blends in (or stands out for the wrong reasons) sits, accumulates DOM, and sells for less. The photos are not a detail. They are the listing.
What a Great Listing Photo Set Looks Like

For reference, here's what a professional listing photo package for a 3–4 bedroom Sacramento-area home should include:
Exterior hero shot — front of home at golden hour or twilight, clear sky, no cars, landscaping fresh
Exterior additional angles — side yard, rear yard with patio/pool if applicable, street view for context
Living room — 2–3 angles from corners/doorways, all lights on, decluttered and styled
Kitchen — 2–3 angles showing countertop space, appliances, and any island or breakfast bar
Dining area — table styled simply (place settings or a centerpiece), shot from end of room
Primary bedroom — hotel-style bedding, symmetrical layout, all lights on, closet shown if walk-in
Additional bedrooms — one clear angle showing size, windows, and closet
Primary bathroom — vanity cleared, white towels hung, all lights on, toilet lid closed
Additional bathrooms — at least one photo of each full bathroom
Laundry area — even if small, show it's there
Garage interior — clean, organized, empty if possible
Any bonus spaces — home office, den, bonus room, finished basement
Aerial/drone — top-down and perspective shots showing lot, neighborhood context, and proximity to amenities
Virtual tour / 3D walkthrough — Matterport or equivalent for any home over $450,000
Total: 30–50 professionally edited, HDR-processed images minimum. This is not excessive — it is the standard for a competitive listing in 2026.
How Goree & Thompson Handles Listing Photography
At Goree & Thompson, professional photography isn't an optional add-on — it's a standard part of how we bring every listing to market. We work with experienced real estate photographers who understand Sacramento's market, shoot at the optimal time of day for each home's orientation, and deliver edited HDR images that make your home look its absolute best on every platform.
Before every shoot, we walk the property with sellers to ensure every room is staged for the camera — not just cleaned. We review every photo before the listing goes live and provide feedback until the set accurately represents the home at its best.
Because in today's market, the listing photo isn't just marketing. It's your first negotiation.
Frequently Asked Questions
How much does real estate photography cost?
Professional real estate photography for a standard home typically ranges from $150–$400 depending on the size of the home, the number of photos, and whether add-ons like aerial drone, video walkthrough, or 3D virtual tour are included. For most mid-market Sacramento homes, a comprehensive package with 30–40 photos, aerial shots, and basic video runs $250–$500. The return on this investment — measured in faster sales and higher offers — consistently exceeds the cost by a factor of 10x or more.
Can my agent take the photos instead of a professional?
An agent can take photos — but should they? Only if that agent has professional-grade equipment (full-frame camera, wide-angle lens, off-camera flash, HDR software) and documented experience in real estate interior photography. An agent using a DSLR without proper technique will produce results nearly indistinguishable from a phone photo. Ask to see examples of listings your agent has personally photographed before accepting phone or agent photography as your listing's visual strategy.
When is the best time of day to photograph a home?
For exteriors: the hour before sunset (evening golden hour) is ideal for most homes, or the hour after sunrise for east-facing homes. For interiors: morning shoots with soft natural light produce the most consistent results. Avoid midday for exterior shots — harsh overhead sun flattens architectural detail and creates unflattering shadows. For the most dramatic exterior impact, ask about twilight photography — the 15–20 minute window after sunset when sky turns deep blue and interior lights glow warmly.
Should I be home during the photo shoot?
No — it's typically better if you're not. Your presence can distract the photographer and limit how they move through the space. More importantly, pets, personal items, and any evidence of daily living should be entirely removed before the shoot. Drop off the dog, clear every counter and surface, turn on every light, open all window treatments, and then let the photographer work.
Does virtual staging work as an alternative to real staging for photos?
Virtual staging — digitally adding furniture and decor to photos of empty rooms — can be effective for vacant homes where physical staging isn't practical. It costs $50–$150 per room and can make empty spaces look furnished and inviting. However, disclosure is important: buyers will notice when the real home doesn't match virtually staged photos, which can create a jarring disconnect at showings. Always disclose that photos have been virtually staged, and ensure the actual home is clean and well-presented for in-person visits.
Photo-Ready Checklist: Do This Before the Photographer Arrives
Whole Home:
✅ Every light on, all bulbs working and matching color temperature (2700K–3000K)
✅ Every window treatment open or removed to maximize natural light
✅ Every window cleaned inside and out within the week before the shoot
✅ All pets and pet items removed from the property entirely
Room by Room:
✅ Kitchen counters completely cleared — not one item except intentional staging
✅ Refrigerator cleared of all magnets, photos, and notes
✅ Bathroom vanities completely cleared — soap dispenser and one plant only
✅ All toilet lids closed and shower curtains lowered
✅ Beds made to hotel standard, all personal items off nightstands
✅ All trash cans, laundry, and cleaning supplies removed from view
Exterior:
✅ Lawn mowed and edged within 48 hours of the shoot
✅ All vehicles moved from driveway and immediately in front of home
✅ Hoses, trash cans, garden tools stored out of sight
✅ Front door freshly painted or cleaned; hardware polished
✅ Exterior timing confirmed with photographer for golden hour / optimal sun direction
Ready to List Your Home the Right Way?
The best listing price in the world won't matter if buyers scroll past your photos before they ever read the description. At Goree & Thompson, we treat every listing as a full marketing project — starting with photography that makes your home impossible to ignore.
📞 Contact us today for a free seller consultation — and let's make sure your home's first impression is its best one.
👉 Visit us at: www.goreeandthompson.com | 📱 (916) 897-8548


Comments